Easy DIY Table From Pallets

Looking for a quick and easy DIY project? This pallet table is perfect for anyone who needs an extra table, but doesn’t want to spend a lot of money. You can easily make this table in just a few steps using some recycled pallets.
This table would be great as a gardening table or in your garage or shop. It’s sturdy and easy to build, so it’s perfect for any handyman or woman. Plus, it’s a great way to upcycle some old pallets into something new and useful.

Why Use Pallets?
Pallets are a great material for building. Most of the time you can find them for free, and as long as you do your research to make sure you know what type of wood they are, you can use them for all types of projects. It’s a great way to upcycle wood that might otherwise be thrown away, and it can be useful for all sorts of things.
You can use pallets for tables, chairs, outdoor furniture, and so much more.
Are Pallets Safe to Use?
There is a lot of worry about pallets having toxic chemicals and being unsafe to use for projects – especially things like dining tables that people will be eating on. And there is validity to this worry, as many older pallets are still in circulation that contain something called Methyl Bromide, which is toxic. However, since 2005, most countries have stopped using this chemical and have relied on heat treating and debarking wood instead. As a result, nearly all pallet wood is fine for your projects.
To be safe, familiarize yourself with the various stamps that will appear on pallets. Look for the DB stamp to know for sure, though it may not always appear. If you see MB, run far far away. For more information, visit the pallet safety page to learn more.

Where Can I Find Free Pallets?
A lot of businesses receive shipments on pallets, and they get thrown away all the time. Check the dumpsters behind these stores, or just go and visit the customer service desks to ask. Consider the following:
- Hardware stores
- Construction sites and builders
- Small garden shops
- Furniture stores
- Equipment stores
- Newspaper companies
- Pet stores
- Grocery stores
How to Make a Table Out of Pallets
Making a table out of pallets is really not difficult. Our version requires two pallets, a few cuts, and some screws. Be mindful of any nails in the pallets, and make sure your measurements work around any potential metal in the wood. While this project is definitely easy enough for one person to do alone, you may want to grab a partner for extra help when it comes to holding and screwing.
Here’s what you’ll need to make your own pallet table:
- Hammer
- Circular Saw
- 2-Heat Treated Wood Pallet
- Tape Measure
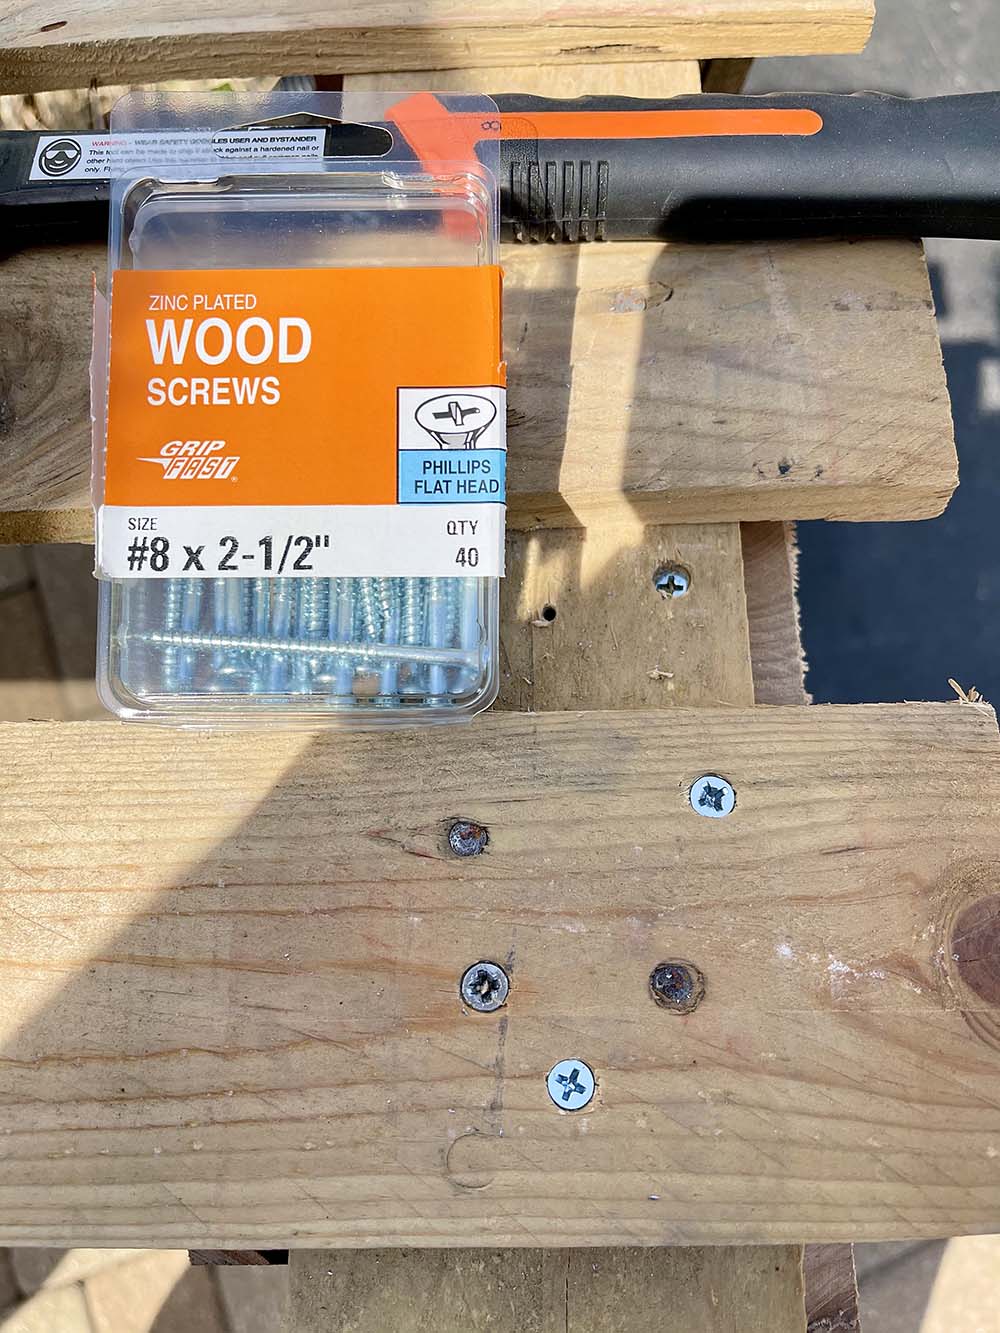
- Box of Zinc Plated Wood Screws #8×2”
- Box of Zinc Plated Wood Screws #8×2 ½”
- Crowbar
- Pencil
- 2 Saw Horses (optional) space to cut your wood safely
- Protective Eyewear
First, you’ll need to find two heat-treated wood pallets. You can often find these for free at your local hardware store or lumberyard.
Selecting Your Pallets:
- Be sure to choose pallets that have even length solid boards for top of table
- Choose your best pallet for the top of your table and the second best for your legs
Cut your Legs:
1. Using your pencil and measuring tape measure the length of your pallet. They are usually 48×40. So since our pallet is 48 inches long we measured 4 x 12 inch sections.
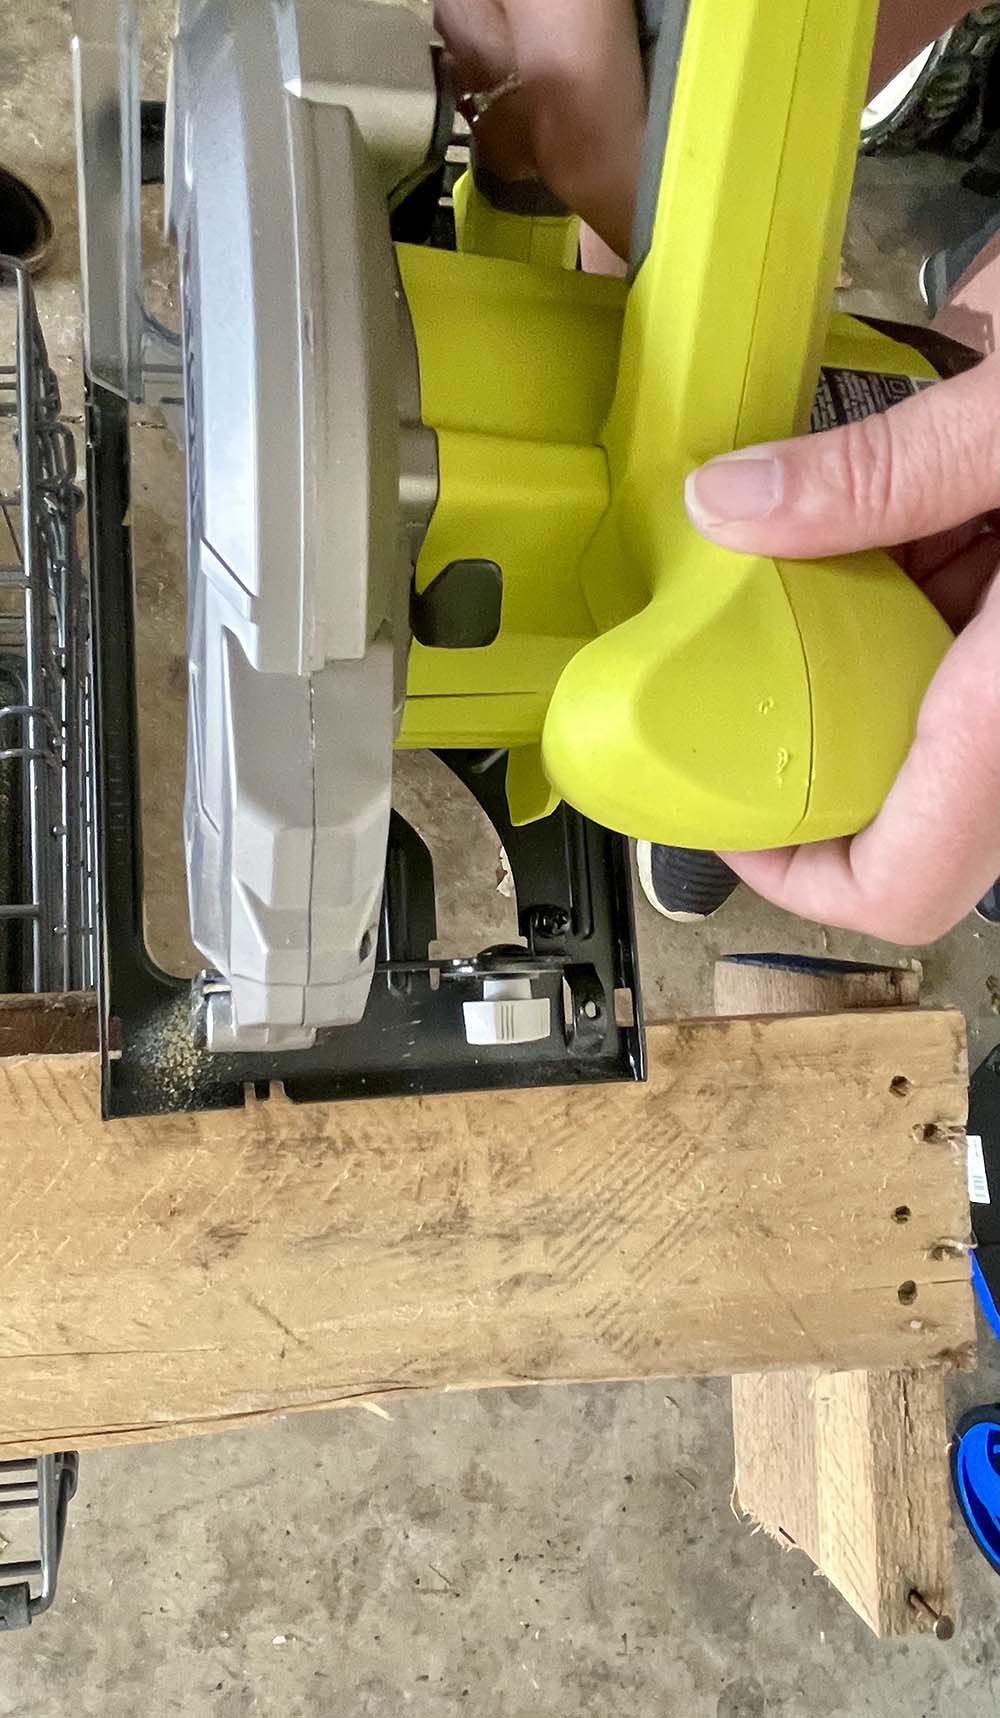
Be sure to measure your pallet on the side that will be easiest to cut through. We are going to cut this pallet into 4 pieces to create four legs for your table. If nails are present, flip your pallet and check the other side. Measure on the side that is easiest to cut through with no nails in the area you need to cut.
Once you have found the easiest end to cut, take your pencil and mark your line from one end of the pallet to the other end so it’s easy to follow with the circular saw. Remember that we are cutting the boards vertically, not horizontally. We will need the support boards on top and bottom of your legs.
2. Put on protective eye wear and place your pallet on the saw horse or area you can safely cut.
3. Using your circular saw, line the blade of the saw to your pencil line measurement. Make your cut. Your cut should be a straight line from one end of the pallet to the other. If there are multiple boards you may need to flip your pallet to cut through. Most circular saws only cut through 2 inches. If you have to flip your board to cut through safely, please do so. Be safe and take your time.
4. Repeat step above and continue to cut your three remaining legs of the pallet.
5. Now you should have your pallet cut in 4 sections.

6. Using your measuring tape and pencil, measure your legs to your desired height. A good rule of thumb is to measure from your waist to the floor. Then subtract 5 inches for the table top. For us that was 40 inches minus 5 inches, for a total of 35 inches. Mark this on your pallet leg.

7. Put on protective eyewear, place the leg on saw horses, and grab circular saw
8. Make your cut. Be sure to cut avoiding any existing nails. Flip your leg and cut through other side. Your leg should be the desired length. Keep the remaining cut off portion for later.
9. Repeat this step 3 more times. Be sure your measurements are precise to ensure your leg lengths will all be the same.


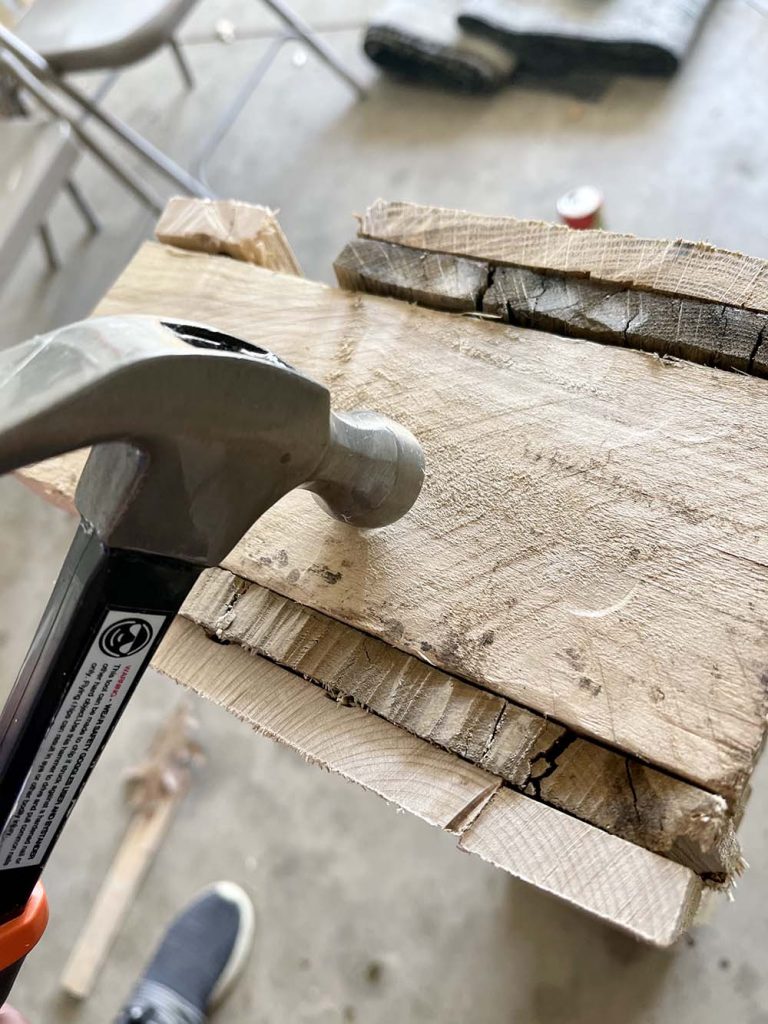
10. Using your hammer remove any exposed and unwanted nails.
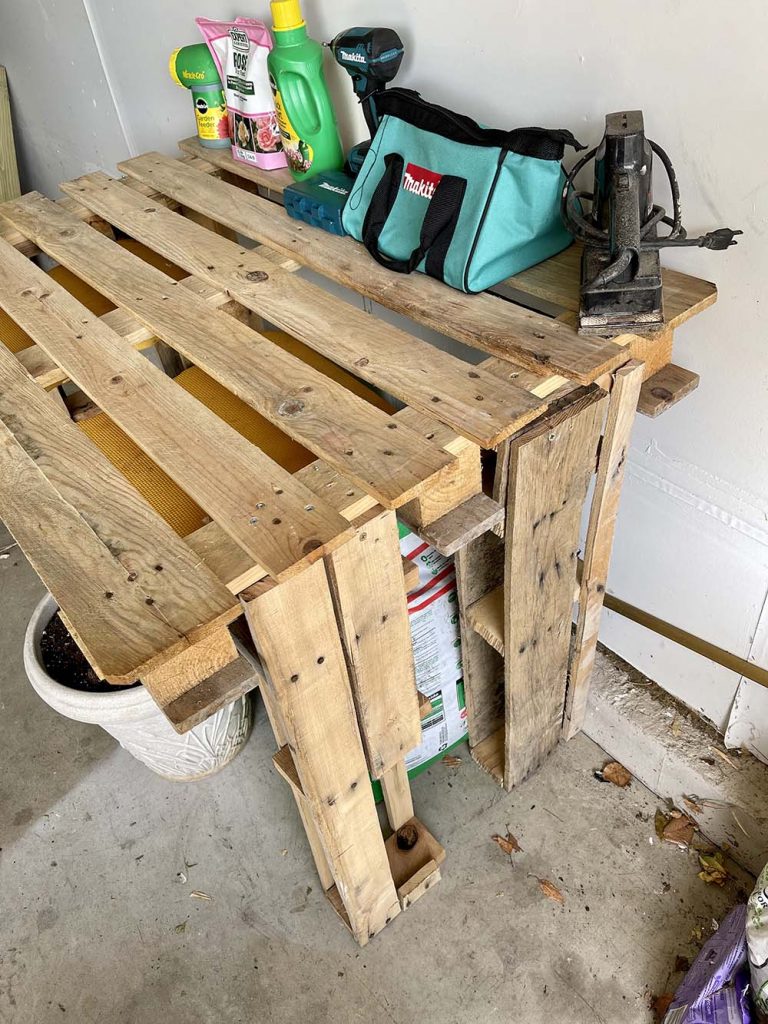
11. Now take one of your legs so the end you just cut is facing the sky. Using the shorter piece you just cut off slip it into the open end of the leg. You may have to remove one of the side boards to have a perfect fit. Pound in place with a hammer. If you do this right, both ends of your leg will have a board on the ground and a board on top as shown in pic. Secure in place using #8 x 2 ½” screws. Use your power drill and secure with two nails one on each side to ensure the cuts are secured together.

12. Repeat step above 3 more times to finish the legs of your table.

Secure your table top pallet on pallet legs:
1. Place your 4 pallet legs upright ensuring the cut you made is facing the sky. Take your table top pallet and place on top of four legs. This may take two people. Place the legs on the sides of the pallet, two on each side. They should be lined up to the edge of the pallet in between the support wood of the pallet. Be sure your legs are even and the table is level. Make sure you are on even ground. If your legs are not even your table will not be level. Recut if necessary.

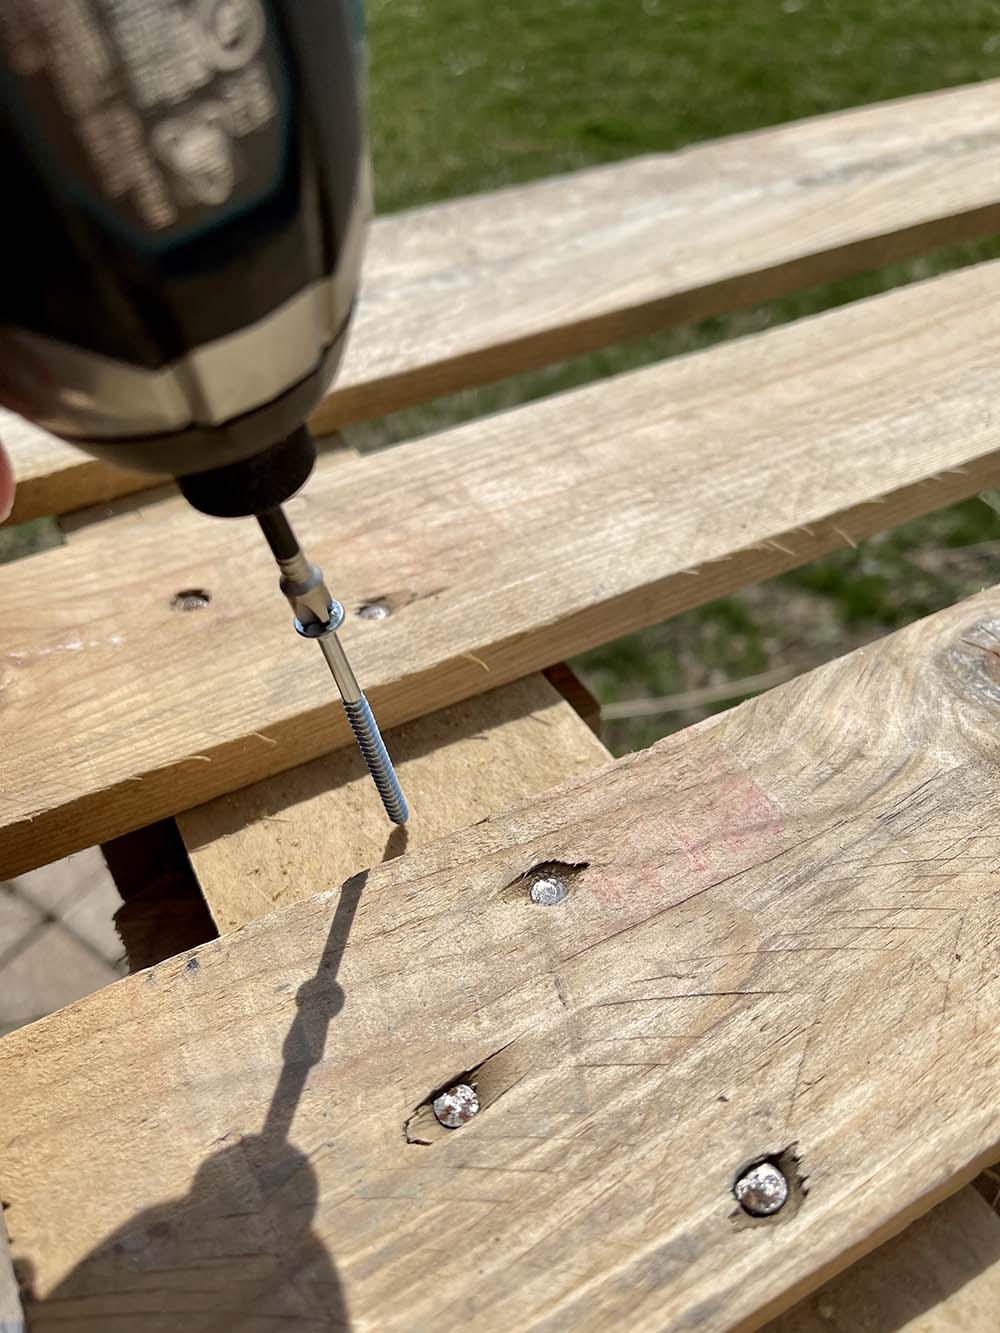
2. Put on protective eyewear, grab drill, and #8 x 2” screws. Drill from top of table into each leg and secure table top to each leg. We put 4 to 5 screws for each leg, be sure to avoid existing nails or screws.


3. Now your table top should be secure to your four legs. Place in the area where you intend to use.
- For extra support you can secure table to wall using L Brackets found at your local hardware store. Be sure to use a stud finder and secure into studs using the L Bracket. Be sure to avoid any metal piping and electricity that may be behind the drywall. This step is not necessary if your legs are measured accurately as your table should be sturdy without.


What do you think? Is this something you will make? It is such a great idea for a gardening bench, and it’s so easy to transport into and out of the garage or shed. I love the fact it has some built in shelving, as well. It’s also great as a little workbench. And it’s sturdy as a brick!
I hope you’ll give it a try and let me know how it turns out.